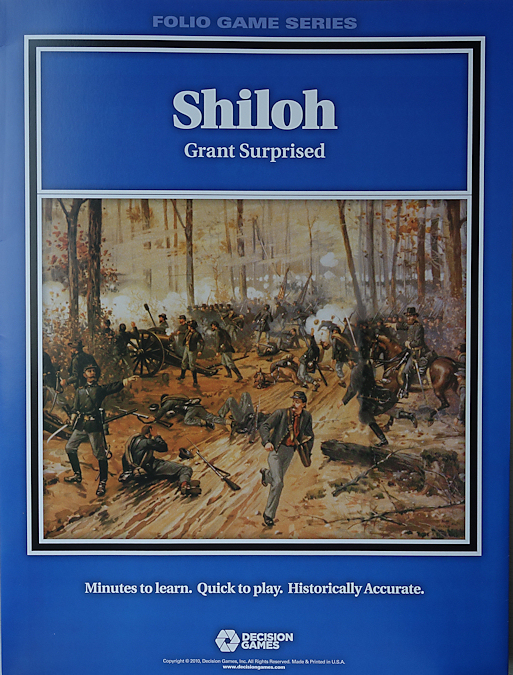
The battle of Shiloh 1862 is one of the titles from the Decision Games Folio Series. The game is governed by the Musket and Saber series rules together with a set of exclusive rules.
Press 'read more' for the rest of this article.
I should firstly explain that I have previously owned this game. Last year I bought Shiloh, Marengo and Chickamauga from this series and set about playing Shiloh, simply as it has the nicest map, the biggest hexes, the game starts with low unit density and the cavalry rules are not needed.
At that time, only the full rules were available and it was a strange experience. I read through the rules, everything seemed straight forward and there were some neat ideas. Then I played a face to face with Mike (hello Mike). We are experienced players but we just got bogged down with the rules, which were never out of our hands, there just seemed to be too much sub - system. We gave it some three hours and in the end, with the fun gone, we just gave up. I sold all three games.
Fast forward to now - DG have provided a cut down version of the rules (called Quick Play) and these will be appearing in the new range of ACW games in the mini-folio series (40 counters). Happily, the rules can also be used with the bigger folio games, so I re-bought Marengo (a favourite battle) and Shiloh and decided to give them another go.
The Quick Play rules are clearly presented, an easy read and made me quite happy to give this another go. So on with the game.
QUICK OVERVIEW
The Confederate objective is Pittsburg Landing. The Union objective is the map edge for the Corinth Road. Both are sudden death victory locations. If neither is captured by game end, then victory is based upon casualties.
The Confederate player starts with ‘active’ leaders and the army is fresh. From turn 6 onwards until the end of the first day (turn 10), they will test to see if their army becomes fatigued, the biggest effect of which is that units must take a morale check on entering an enemy ZOC, disrupting if failing.
A small on-board Union force starts with an inactive leader. Some Union forces enter play as reinforcements (see the turn track below) in the traditional way, but the bulk of initial forces enter play by a mechanic that shows them slowly organising themselves on map within their encampments. Essentially there are several encampments on the map. The Union has a number of units in a chit cup. At the start of the movement phase on turn 1 a die is rolled and that many number of Union units are blindly drawn and placed at their respective encampments (they are free to be immediately used). On turn two, two dice are rolled and the same happens. If there are any remaining units left in the cup on turn 3, they are automatically placed on the map.
Active leaders can lend their combat and morale values to units that they are stacked with, this can bring some powerful values into play, so active leaders at the point of attack are very useful.
On turn 1, the Confederates get the ‘surprise’ rule. This causes any Union units initially contacted to take a morale test and disrupt if failing. If this happens a second time, the unit routs.
 |
| Set-up |
1/ Pittsburg Landing.
2/ Road to Corinth.
3/ Initial attack by Gladden will contact both of these Union units, astride the road.
4/ Confederates will attack here and take Shiloh Church.
5/ The Sunken Road has two hexsides counting as protected.
6/ The Cloud Field encampment.
Important - Units do not have to attack - but if any enemy that exerts a ZOC is not attacked, then at the end of the combat phase it can make its own attack (a sort of counter-attack) and get a doubling of their combat value when they do!
Important - Any number of units can stack BUT more than three and the entire hex disrupts and in any case a max of 2 units per hex can be engaged in combat, with 1 being artillery.
The Confederate player is the first player.
MOVEMENT. The Confederates obviously move to make best use of the surprise rule. Around Shiloh Church a Union unit is contacted twice, they fail their morale checks and rout back 3 hexes.
Above that position, Gladden pushes up the road (see map below) and moves adjacent to two units that each sit astride that road. They both fail their morale checks and disrupt. The Confederates cannot reach that location with a second unit and so cannot attempt to rout those units.
 |
| Gladden makes contact. Units check morale by rolling against their middle number. Note the Sunken Road defences (top left) and the Peach Orchard in the next hex. |
The Confederate leaders (3 of them) move out from their army headquarters hex and head up to the front.
Disrupted units do not have a ZOC, so do not get to counter-attack back if they are not attacked. Fortunately for Gladden, both the Union units are disrupted so they lose their ZOC’s and so will not be able to attack back in that way.
ATTACK PHASE
The Confederates launch their attack from the Shiloh Church area. They have two infantry units and 1 artillery unit. In combat only 2 units per hex can participate (1 artillery and any other unit can attack or defend), the rest of the stack remain passive but share in any retreat results.
A lead unit has to be designated. The Confederates select Shaver (he has the best morale, which will matter if the combat result calls for a morale check) and the artillery to attack. In defence the Union have the 4/5 infantry and the inactive leader Sherman in light woods. The defenders have a combat value of 4. The attackers strengths are 5 for infantry plus 2 for artillery (which also have a ranged fire capability by the way). Those 7 attack points are halved (rounded up) to 4 because they are attacking across an open hexside into light woods (I like that twist of using the wood edge).
The DIFFERENTIAL between the two values (4 for both attacker and defender) is zero, the zero column of the combat chart is cross indexed with a die roll. In this instance the roll was a 6, causing a Dr result.
Dr means the defender can choose to retreat 1, 2 or 3 hexes OR they can choose to stand and disrupt. In this instance they decide to retreat 1 hex onto high ground. The lead Confederate unit can advance after combat, which it does. Artillery cannot advance after combat and the third Confederate unit was passive, so remains in place.
 |
| Pre and post positions of units in the above mentioned combat. |
Gladden makes an attack on one of the two disrupted units, but gets an Attacker Retreat result for his troubles.
UNION MOVE.
Firstly they draw units from the cup as per the special rules. They roll a 5 and so draw 5 units and place them in the Cloud Field encampment (by Pittsburg Landing) and the Crescent (just behind the combat near Shiloh Church).
Disrupted units can move an allowance equal to a die roll. The Union manage to get a defensive line into place and block the main avenues of approach. At the end of movement, units that would have qualified for march movement (i.e. have not been adjacent to an enemy during that move phase) can automatically remove their disruption markers. Otherwise disruption can be removed if by the end of the turn, the unit is no longer in an EZOC, by passing a morale check.
The Union choose not to attack. This immediately allows those adjacent Confederate units possessing a ZOC to make their own attacks (counter-attacks at double strength). Only one attack of any significance takes place. Shaver with Artillery support attacks a lone Union artillery unit. This causes the Union artillery to retreat. Artillery that retreats gets flipped onto its inactive side.
 |
| map at the end of turn 1. |
2/ The Confederate attacks have started to break into the Union position, though that is a potentially precarious situation for that Confederate unit.
3/ Turn 2 Confederate reinforcements are sitting just off map.
4/ The Cloud Field encampment.
5/ The Crescent Field encampment.
Well that was the first turn and it took me an hour to get through it (though I did write 3 pages of notes along the way). The two main reasons were that I still needed to do rule checking to get the system properly into my head, this feels really strange as it is so straight forward when you read it. Secondly, there were a couple of rule instances that were a bit unclear, so I dived into the full rule book to get a fuller explanation (which is nicely written). That always helped but also drew me into the ‘fuller’ rule, which I then had to go back to the Quick Play set to make sure that I didn’t bring any of the ‘full rules’ into my game for reasons of consistency.
The second turn had more units on the map, but that took me just 25 minutes to work through, so improvements in that regard.
 |
| end of turn 3 |
1/ The Union still hold the sunken Road and have just retreated from the Peach Orchard. Confederate forces are starting to outflank the position.
2/ Grant arrives with some reinforcements but they are rather fragile, each being a one stepper.
 |
| Turn 4 - The Union are exposed at the Sunken Road. |
In the lower part of the photo, the surrounded Union stack looks vulnerable, a third Confederate stack arrives and they attack - but two of the attacks are launched from stream hexes (badly chosen) and the defenders are in a stream. The combined terrain effect really reduces the differential and the attackers suffer a retreat result. They all fall back and the Union unit escapes.
It is tempting to always stack artillery with an infantry unit to maximise strengths in a hex, but in the few areas of open ground, keeping the artillery out of an enemy ZOC to bombard or make ranged support, can offer some greater flexibility.
The nuances of the terrain (slopes / streams etc), make for a lot of interesting local situations and stalemates will arise, in some cases, requiring the line to be opened up further along.
By turn 5, the Confederates are struggling to make real progress. In turn 6, they get unlucky and roll fatigue, so until turn 10 (night) they will have to take morale checks every time they move adjacent to an enemy, disrupting if they fail - that is quite a limitation.
Turn 7, with the line stabilised, the Union can choose where to send reinforcements. The long term plan is to push with the right flank and drive directly towards Corinth Roads, causing the rest of the Confederate position to collapse.
 |
| end of turn 7 |
2/ The Union line thickens to protect the route directly to Pittsburg Landing.
3/ The Union begin to assemble troops to assault on the right, they hope that the threat this causes will relieve the position at 1.
 |
| close up of the end of turn 7 photo (above), showing the areas most likely to see heavy fighting. |
 |
| End of turn 10 (night) and appropriately, I lost my own good light hence the rather dark, rough looking high ISO photo. |
1/ a surprise to both sides - the Union have started to break through (aided by some powerful artillery).
2/ The right flank has been receiving all the fresh units and it begins to pile on the pressure. The terrain is quite defensible here and can be held by relatively few Confederate units, but once this big Union force breaks through, the Confederates will be in serious trouble.
Turn 11 (Day 2)
The Confederates realise that they are not going to be able to capture Pittsburg Landing, so they plan to start falling back, using terrain to slow down the Union and cause casualties. In an effort to shorten the line, they successfully attack the Sunken Road and Peach Orchard and relieve the ‘bulge’.
Turn 12
 |
| Beauregard (centre grey stack) |
Beauregard (centre grey stack above) has taken position on a stream in light woods. The Union positions are also on streams. Unit strengths are halved when effected by terrain and reduce to a value of 1 if effected twice. Here attacking out of and into streams reduces strengths so the Union get the double penalty, taking the combat value of each unit down to 1. Beauregard is holding an excellent position and is pretty much unassailable at present due to his flanking units guarding other potential attack locations.
 |
| The Union are in Peach Orchard (centre blue unit). |
The Union are in Peach Orchard, which counts as light woods and all Confederate units that attack into those woods do so across an open hexside, so they are each halved (plus the top unit is on a stream so its value is further reduced to 1). Never-the-less, they launch their attack. A fatal mistake, as they get an attacker retreat result. This has opened up a pocket that the Union will likely fill on their part of the turn.
 |
| The bulge caused by the attacker retreat result. |
as predicted, the Union flood into that pocket and create a bulge. But this opportunity cannot really be properly exploited due to lack of troops. Earlier in the game, the Union decided to send all their fresh stuff and most of the artillery over to the right wing for a breakthrough there (which by the way is not happening anytime soon!).
Turns 13 - 16.
The Union make repeated attacks, trying to get a decent breakthrough, but the Confederates hold terrain that gives a couple of really good defensive anchor points, which are causing the Union serious problems. The few concentrated attacks made are causing a lot of Ex(change) results, so each side is finding it tough, with the Confederate line getting Brittle and the Union attack running out of steam.
Turn 17 (last turn)

1/ The Union re-capture Shiloh Church.
2/ Beauregard is still holding out! The most recent major Union assault there has just suffered an Attacker Retreat result.
3/ Confederate forces are holding back the weak single sided units that came in with Grant on turn three.
4/ The Union are pushing forward but do not really have the strength or numbers they need here.
5/ The Union artillery is concentrated here.
Since neither side had reached their sudden death victory objectives during play, at the end of turn 17, victory is decided by the number of casualties. The Confederates have 5 units removed from the board and the Union have 3 (including 2 artillery that were lost on exchange results) - so the Union have more points, but the result is converted to a draw because the difference is not greater than 10.
Conclusion.
Compared to my first playing last year, the Quick Play rules have been much easier to work with. There is plenty enough system remaining for a solid and interesting game.
It looks like it would be relatively straight forward to step up from these rules to the full set. I see three main changes. Firstly is the co-ordination rule, encouraging units from the same formation to fight together. I like that.
Secondly is the ‘Choice of Tactics’ rule, in which a player can pick a tactic from a list of skirmish, charge, press forward, disengage and last stand, but these modify combat results and just seem too messy for me to want to bother with.
Finally there are the Fortune of War rules, which perhaps is the biggest single thing that set the two rule books apart. In the Quick Play set, if a unit with a ZOC is not attacked, it can counter-attack in the same phase but the counter-attacking unit value is doubled. In the full rules the player instead gets a Fortune of War. This allows the player to either move an enemy unit, move a friendly unit, charge with a unit, force an enemy morale check or take a friendly recovery check on a unit. That sounds straight forward enough, but in this game I was regularly getting 10 or so units per attacker phase that would qualify. Frankly, the whole thing just seems convoluted to me, I feel there would be better ways to bring some chaos into the game, since that is what is being sought.
That does raise the question of whether the counter-attack alternative in the Quick Play rules is any better. It is certainly a more streamlined and easier rule for the gamer to implement. On the Shiloh map, the very restrictive nature of the terrain and the punitive consequences in combat meant that a lot of units did not attack and this produced a lot of these potential counter-attacks each turn but then that same terrain actually discouraged the counter-attacks to be actually used (it is the players choice - not mandatory). It will be interesting to see how the rule works on more open terrain.
Anyway for those that want it, the Quick Play is a good way to get into the full rules. There are other smaller additions in the fuller rules that are easily picked up. For example under the leader rules, leaders involved in combat run the risk of being removed from play - that might have curtailed some of my rather liberal use of them.
For my money, I would probably use the full rules and drop both the tactics and Fortune rules (replaced with the counter-attack option), though for now I am happy to continue exploring the Quick Play set.
The map is lovely (especially as it has large hexes). I will never like small counters, so that is that, but the counter information is nice and large and I do like the infantry icons. It is a nice package overall.
The game does not give an opportunity to try the cavalry rules. They look good, but in my mind seem more suited to Napoleonic actions, though at this stage I do not know whether other ACW battles have any special rules concerning cavalry or how they would play out under the rules as thy are.
I like the system and combined with the detail of the Shiloh map and the local nuances created by slopes and streams, there is a good simulation feel about the game once you spend less time with the rules and are more engrossed in the game.
The use of morale checks is well applied and I like the small quirks such as light woods to light woods attacks not being modified but crossing a clear hexside to attack light woods are - that feels right. The idea that retreat causes leaders, artillery and cavalry to flip to their inactive sides is another winner.
I did wonder about the rout rules, it reminded me of another game in which the term ‘rubber routers’ was used on the account of routing units being easily returned to battle. Here it does take a turn of staying out of an enemy ZOC to lose the disrupted status, so that does put some sort of brake on them returning too quickly, so perhaps that balance is okay.
There are still some aspects of the Quick Play rules that do not fully mate up with the larger Folio. For example Shiloh has HQ units. The exclusive Shiloh rules have them being able to bring a replacement step into play each turn that they are active. This seems an important part of the scenario but there is no mention of HQ’s in the Fast play set, so I simply chose to have them as none moving and active (bringing in one replacement per turn) until overrun by an enemy, at which time they can be removed from play.
Overall, I am pleased that DG developed this Quick Play version of the rules. I will have a go of the Marengo to see how they feel in a different battle situation and timeframe and will be buying Saalfeld, which is a mini folio napoleonic game intended to be used specifically with the Quick Play rules.
Solitaire - This is a two player game that is rated on the back cover as having high solitaire value, which it does. The unpredictability of the combat table and morale checks helps keep things uncertain for the solitaire gamer.
Time - The back cover says 1 - 2 hours. That rating must have been made by gamers very well versed in the system and even then seems somewhat optimistic. Certainly an initial game is going to take longer than that, even with the Quick Play rules. My game took a long Sunday afternoon - plus some. A second game should sit in a standard evening session.
Size - This is a half size mapper with 80 counters. The turn track is on the map and you do not need space around the board for any support material. The charts run off the back of the exclusive rules. The folio games come in a folder, so are similar to a magazine game in terms of storage, though with fewer counters. This is a compact game
Complexity - The game comes with the full rules and a quick play set is now available as a download from the DG website (or in one of the upcoming mini-folio games). On the face of it, there doesn’t seem a massive difference between the two sets but from experience, the full rules add a layer of detail that just seems harder for this gamer to assimilate when starting from cold. DG rate the games complexity as low (2 out of 5) with the full rules included in the game. I would disagree with that rating, though would be happy to consider the Quick Play rules as meeting that sort of score. If you plan to play face to face, It might be best just doing a couple of turns (better still the first day) solitaire first so that your face to face game runs more smoothly from the outset. The Quick Play set seem the best and quickest way to get the familiarity needed to get the most out of the game.
EDIT - Thanks to David Schubert (on Consimworld) for pointing out some new errata - amongst other things, it does make routing more deadly.
7.5 Combat Results. Change the definition of Ax or Dx to read:
Ax or Dx = Attacker Loss or Defender Loss. The affected unit loses a step (7.7); no advance or retreat is made.
Also, bombardments satisfy the need to attack an enemy unit.
7.6 Retreats & the SLR. Under the Unsafe Line of Retreat, a unit takes a loss before it routs again. Change the Unsafe Line of Retreat to read:
Unsafe Line of Retreat: This is identical to the SLR but passes through an unnegated EZOC and/or ends in an EZOC. In this case, the unit takes a loss (7.7), then routs from the unsafe hex. A unit may take a loss and rout any number of times until it no longer has a line of retreat or retreats off the map.
EDIT (2)
I re-ran the game (Quick Play rules) and turn 1 took 12 minutes. For most of the play I did not reference the rules. Using the above errata, casualties were much higher, with the Confederates losing 11 units, while the Union lost 12. This is converted to a draw as the difference between the two losses is not greater than 10. This time the Union re-took more ground but did not get the breakthrough they needed to reach Corinth Roads.
Although the general flow of the game was similar, I felt it played differently enough for me to want to play it again (though Marengo still beckons next).
No comments:
Post a Comment
Thanks for taking the time to comment