As much as I love the grand spectacle of big tables, dressed with beautiful terrain and occupied by dazzling 28mm figures, parading on their generous frontages, the truth is, this style of wargaming does need plenty of space for both play and storage. In my own situation of now living in a smaller place and having back trouble that makes leaning over tables somewhat perilous, any figure gaming is now better suited to a compact setup (by that, I mean smaller than dining table size for solitaire play). This has led to my latest project - marrying up a small 6mm scale with a pinboard sized playing area.
I am guessing that for various reasons, there are plenty of gamers looking for a compact way to run their miniature games and so I am starting what I hope will be a collection of posts themed around this project, that may be of interest to others. Those who are already doing it, please add your thoughts to these posts, it would be good to hear from you.
This project is being done from scratch, so any readers who have not done miniatures before can join in and even modify the project for their own needs, for example going to a larger / smaller play area or translating a boardgame to a figure game, or whatever.
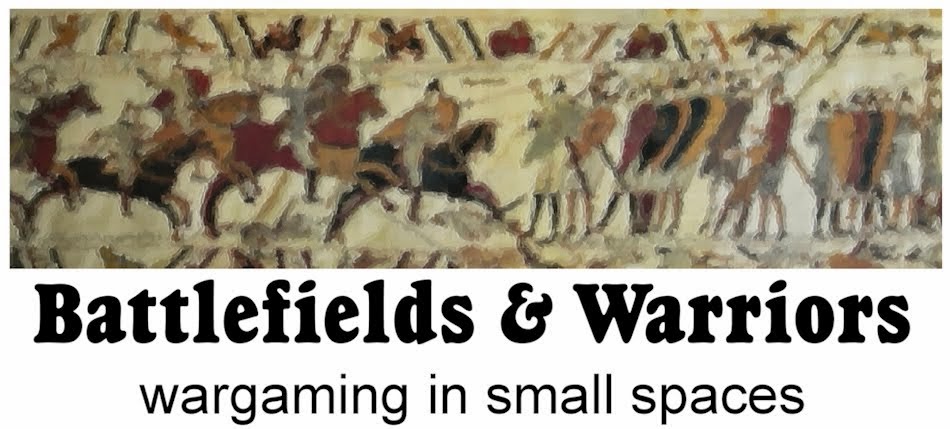
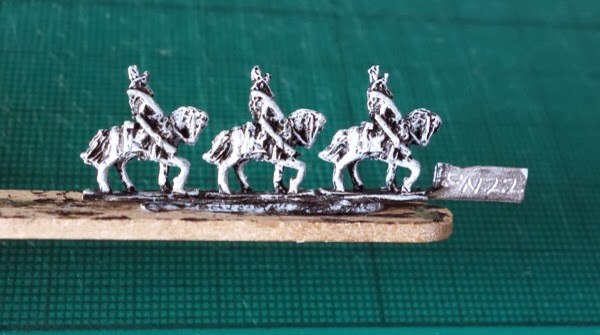
 6mm Empress Dragoons (Heroics & Ros).
Project drivers: There are some basic things that will impact on how I go about this.
1/ I don't particularly like painting figures. Don't worry, I'm not at the point of being happy with a blue army and a red army - but don't be looking for those breath taking results that others seem to be able to accomplish, using some form of wizardy no doubt. This all going to be about getting some stuff onto a table in promt order.
2/ I have a wide interest in historical subjects, so be prepared to see me jump between periods a bit, so stick with your favourite period, rather than follow what I am doing as the months go by. I will likely do a WWII force to start off with as this needs fairly minimal forces and so will at least allow some early gaming to keep enthusiasm going.
3/ I prefer game rules to be at the lower end of the complexity spectrum, for games to end in a single session and for them to be playable solitaire as well as face to face, so that is the kind of play that I will be representing here.
4/ To keep the project moving forward and to record how it evolves, I will create an update post every month for the next six months. Hopefully by that time, something good will have come of this. Time is precious, so I am under-taking to spend a little less time just browsing the internet and use that time instead to work on the project. That alone is probably a force for good.
5/ Storage space is as much a consideration as gaming space, so I will be aiming to have the project storable in just a few box files and I am disciplining myself to have painting and creative materials in the smallest plastic tub that I can manage.
6/ Mostly everything on the project with be newly bought in, so that the reader wanting to get involved, gets a more accurate idea of the costs and realistic efforts needed to get something like this up and running.
Figure Scale: I suppose the first thing that came into my head was 2mm. The terrain would certainly look good on our pinboard, giving that 'bird's eye' look of the battlefield, but I just find the pieces too fidley to be handled by my banana fingers and not aesthetically pleasing enough to take centre stage of my gaming world.
The new kid on the block is 3mm, which looked quite promising for 'pinboad wars'. So I ordered a few packs (from Fighting 15's). They are certainly interesting and it might be worth the reader buying a bag or two to give them a once over.
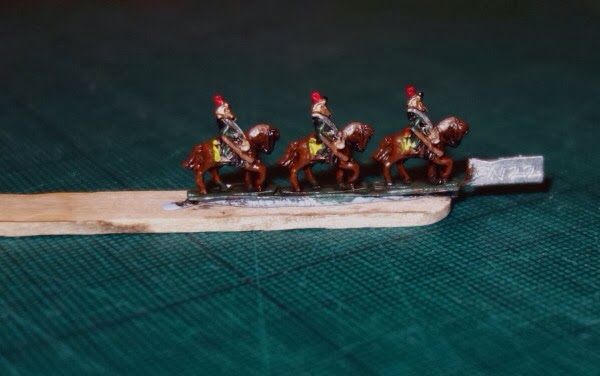
 3mm napoleonic infantry and cavalry and WWII Russian tanks by Oddzal Osmy
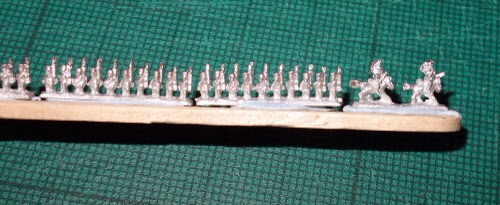 Napoleonic generic line infantry and heavy cavalry on their painting stick
 Generic bases done as French line infantry, French heavy cavalry and Austrian line
6mm and 3mm T-34 and 6mm Empress Dragoons
Game Board: To cut to the chase, I have settled on a 90cm x 60cm pinboard (From Rymans in the UK). I chose the dearer one which is a whiteboard, not for the whiteboard itself, but because it is made from MDF (wood) and will stand up to painting and such like. The cheaper board looks like cork, but it is really a very thin cork veneer on a corrugated cardboard core. The veneer was so thin, that I could detect the undulations of the card below, no doubt excellent as a pinboard but perhaps less robust for my needs, as paint and paste fillers etc, may well cause some reactions with the card material.The pinboard helps in several regards. It is easy to store down the side of a cupboard. The frame gives a nice smart edge and is useful when sliding the board slightly to the other side of the table to help your opponent take their go, or dragging it towards yourself, so that reaching to the far side of the board is not a problem. This way, most things on the board are never really more than a couple of feet from your eyes, which helps make the 6mm scale more recognisable. How I dress the game board will be covered later. Because the frame causes the board to appear sunken, I may fill out the reverse side of the board with MDF hexes to give an alternative playing surface.
(EDIT - I have since also bought a 3' x 2' piece of proper pinboard. This is about 1cm tick, fairly heavy and dense, with a fiberous surface (cost £11.50). This standard sized board is actually two inches longer in both directions than the pinboard and some users may prefer that. The reason I got it was that it allowed me to create a 5" hex grid 7 wide by 5 deep, as an off-shoot to this project. The board itself of course would be fine as a game board in its own right, regardless of using a hex grid).
 This is a shot of my Kallistra hex terrain (10cm hexes) with 10mm figures from Pendraken, this table is double the playing area of the proposed pinboard project.
I will undercoat in black (brush applied primer, because spraying in an apartment could lead me to harm - I know that because my wife told me!) and once dry will heavily drybrush with white. I find that the smaller scale looks better at near distance if they are brighter coloured than might be considered normal. Even though I know that, I still paint to historical colours, so my stuff at 2 feet away can look a little dark.
I applied a thinned wash (Army Painter soft tone ink) when I tried the 3mm bases and that was too drastic, especially on my Austrian white uniforms, so for the 6mm, I will just have to see what works best, as a dirty wash can kill that vibrancy, but you need some kind of coating to unify the figure, so that it doesn't look like Bogo the clown. (Edit, I have tried a quick coat of varnish, then lined in the wash rather than splash it all over, then varnished again and that seems to give a better look).
 6mm, black primer and heavily brushed with white.
The same figures with paint, varnish, a thinned ink wash and another coat of varnish coat
Look away now if you don't like vulgar language - I am going to be using 'speed painting' techniques ...... there I've said it. Despite the name, it still requires care, for example applying the primer to my 21 Empress Dragoons took half an hour to complete, but this preparation is essential to prevent problems later. Of course, in contrast the white brushing over the black primer only took a few minutes, even though I did that twice for extra vibrancy. The painting technique in the way that I use it, requires figures placed on a stick (held with Blue-Tak putty) an then you just go down the line with the brush, dabbing or doing single strokes and catching highlights. Small mistakes are mostly ignored, because they will become lost in the overall impression that the figures give when based.
The problem with close up digital photography is that it shows far more detail than the eye will see at normal distances, so you can't really compare the image to how it looks on the table.
The figures were finished with a hand brushed artists varnish (for the non-yellowing properties and again, to avoid spraying indoors).
Basing and Rules: Well that's a slightly tough one at the moment. Visually, I want to avoid thick bases and deep bases, unless the depth is used for estra ranks. I need all the help I can get to keep a small footprint. The 1cm depth that I used for the 3mm scale was not deep enough (to help define the front ofthe unit and establish facing), so some further thought is needed.
More importantly, is to decide whether to just go for the whole unit in line on one base or whether to have a unit formed from several bases, so they can do column and square etc. Whatever I do, I would like the end product to be usable with a wide range of rule systems. I will probably start with some napoleonics and WWII, but would also like to get some dark age stuff on the table and some American civil war forces (see what I mean about flitting about between periods!).
Visually, it is helpful to design bases to 'signaI' what's on them, so mortars could go onto disks and HMG's could go onto triangles or say add rubble to all HMG bases, irregular cavalry can have the loose and disordered look, while heavy cavalry can be tight together in line formation. I will also be dabbling with home made rules, so this could all go in any direction.
My rough costs so far have been £15 (pinboard) £12 (some extra acrylic paints) £10 on flocks and clump foliage £10 (6mm samples) £10 (3mm samples). I am thinking that spending maybe £20 a month for the next 6 months might be a sensible balance between spending and the time I have available to prep up the various aspects of the project, so that I avoid a lead mountain. With that in mind, I will do a monthly project post to keep readers updated.
Well that's it for now. Please re-visit this 6mm project blog label sometime and see how things progress.
Sources of interest:
Shaun's wargame blog has a lot of information about various game rules being used to play games in a 2 foot x 2 foot area, the game board itself lives in a drawer. Fascinating to follow his journey of gaming and rule testing. Here is a link http://shaun-wargaming-minis.blogspot.co.uk
Heroics & Ros: supplier of a detailed 6mm range. Link http://www.heroicsandros.co.uk
Baccus: supplier of a detailed 6mm range. Link http://www.baccus6mm.co
The Miniatures Page: a superb internet resource for all figure related stuff. Link http://www.theminiaturespage.com
Very Tiny Wars blog -plenty of posts in support of 3mm gaming. Here is the link http://verytinywars.blogspot.co.uk/search/label/1%2F300
As another "space-starved" gamer, I found this interesting and certainly worth pursuing. I have used the black primer/white dry brush technique for the small scale figures, but I use very dilute acrylic paint to effectively stain the white. It gives that vibrancy of colour that is needed with small scale figures, especially horses.
ReplyDeleteGood luck with the project
Hi, ill be very interested to see how this develops. for an example of what i did when strapped for space, see this post on TMP, about half way down I posted a few pics...
ReplyDeletehttp://theminiaturespage.com/boards/msg.mv?id=332956
Steve
I have some minis, but never pulled the trigger on painting / playing. Your project might just inspire me!
ReplyDeleteThanks gents for posting comments. I hope what follows will keep your interest. I need to get better at the 6mm painting technique and maybe the evolution of that will come out in the later posts. Steve, I enjoyed your 'notice board' and envisage something similar myself. From memory I think you were posting some 'small gaming' posts a couple of years ago ( overseas?) which I enjoyed.
ReplyDeleteChris, I hope I can write something that brings people in who fancy a dabble. I will be doing each monthly update partly from the perspective of a new player, just so the posts can reach out to the widest audience.
Your right, I was posted to Germany at the time, and had a small room in the cellar. I'm in Cyprus now and don't even have that!
DeletePainting 6mm can be difficult, but I think the secret is "less is more", and over exaggerate highlights to make em pop.
Steve
I am curious to see how this goes on as well! With little time I bought my 6mm painted, but I feel I should do some painting - I don't hate it but prefer to game.
ReplyDeleteAnd thanks for the shoutout for my blog!
Lastly, I found that the WW2 games did not scale down very well to 2'x2' and only last week made a 30'x20' (30' as it was the width of a map drawer and conveniently if to take a 6'x4' taable and scale down by 2.5 (1" becoming 1cm), you get a 30"x20" board). Should be starting off some games trying out some WW2 rules this year.
3'x2' is I think the sweet spot for scaling down ancient rules for gaming so you are on a winner there!
Try http://cranium27.wordpress.com for 6mm painting inspiration
ReplyDeleteImpressive, I think contrast and bright colours help the most. I struggle with sometimes seeing some of the detail.
Delete